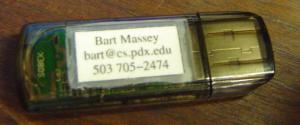
I've gotten tired of irredeemably losing tiny things—I just lost a $25 Bluetooth USB dongle. I also got tired of being unable to distinguish my tiny work keys.
Unless you are pretty dumb, you could figure all of what I'm about to tell you out yourself. But hey, it took me several iterations… :-)
What you'll need:
Now do the obvious thing:
I like white glue in this application because it can probably be soaked off with enough hot water or strong organic solvent. If you don't laminate the label with the tape, the laser-printed lettering will eventually wear off.
Here's my new dongle and its label. Here's an old labeled key.Note how the label text is worn: that happened before I put the tape on. A key in a pocket is in a harsh environment. Note also that the tape is starting to fray at the edges. You may optionally choose to use some stronger tape, although the matte transparent tape is nice to look through.
Enjoy. (B)